Yes! I just finished making my very own automatic water change system for 50 bucks. I have been meaning to do something like this for years and years but I always overcomplicated the design thinking I'd need multiple safety features and float valves etc... Nope! Here is a very simple design for a continuous water change system that really only requires a few parts:
This is what the final product looks like. I decided to mount it on the wall in a spot that I could access it easily, but it could very easily just be mounted behind the tank so that nothing except the water intake tube sticks over the edge of the tank. You can also make the system in black PVC so that it is less visible.
![Image]()
This is what will be visible inside the tank
![Image]()
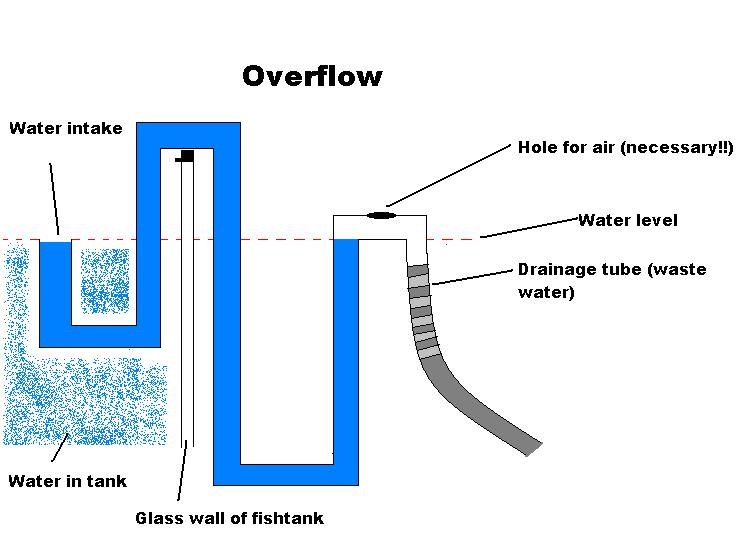
I went about making this system using the idea of an overflow. Basically an overflow is a partial siphon that never fully drains out the tube of water. It responds to an increase in pressure (from the water on top of it in the tank) by pushing some water out of the waste water pipe.
Here is a diagram of what I am talking about:
![Image]()
In a nutshell the important concepts of an overflow are:
The water intake pipe needs to be at the same level as the waste water pipe (seen on the right) to work properly. A hole is also needed above the waste water pipe to equalize the pressure otherwise a constant siphon will be formed when water is added to the system and it will drain all the water out of the tube. To make an overflow, water must remain in the tube at all times and any bubbles trapped within the solid blue section must be removed for proper function.
But for those less familiar with the physics involved in why this works:
Looking at the diagram, water needs to be in the solid blue part of the tube, this means that there should be solid water in the tube from the intake (on the left) to the waste water tube (on the right) with no air bubbles. When this situation is achieved what happens is if pressure is applied to the water intake side the water in the tube has no place to be pushed out of the way except through the tube. The compressed water is forced through the tube and out the waste water side on the right. If the object applying pressure is a slightly overfilled tank then the water itself will be sucked through the tube and out into the waste water end.
Very important to all this is the fact that on the waste water side a hole must be cut on the upper part of the tube. This hole allows the air pressure to equalize which lets the water sit in the bent tube shape permanently. If the hole was not there then a siphon would be created and siphons tend to suck all the water out of a tube making it useless for multiple uses!
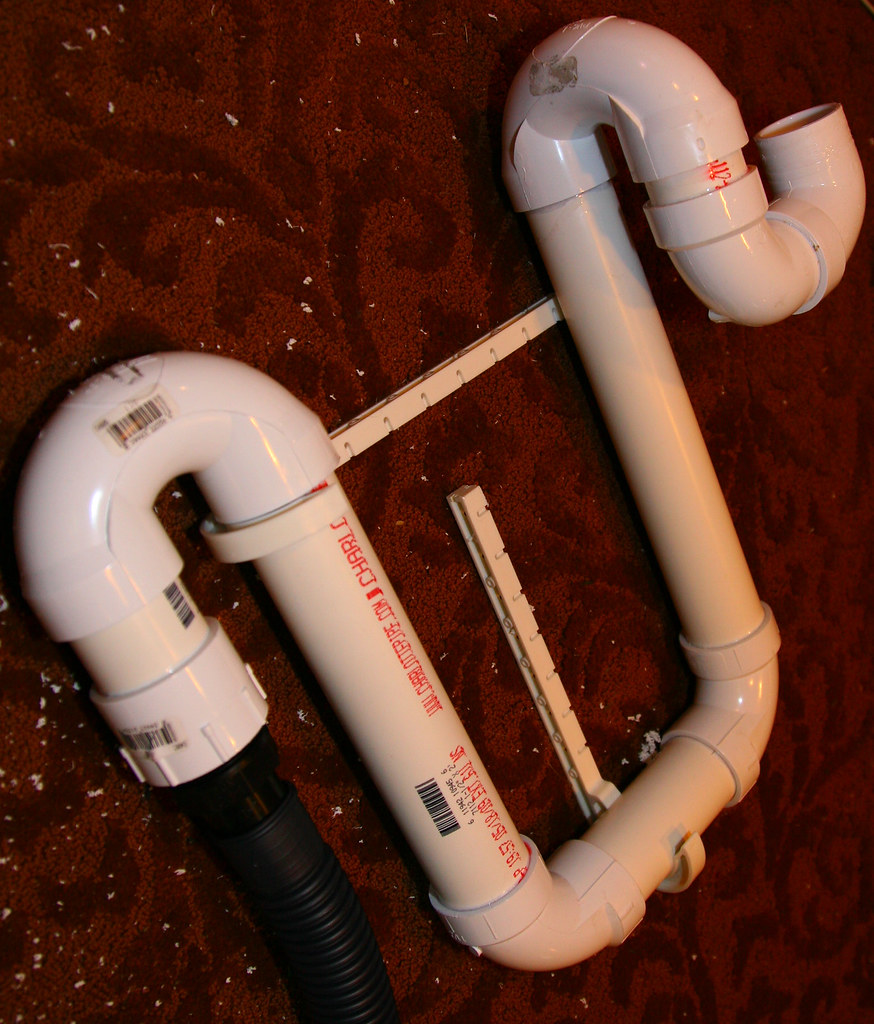
Here are a few pictures of what I started out with. These are just generic plumbing PVC tubes, bends and parts that you can find at any hardware store for a few measly dollars. I used PVC pipe joiner to glue them together.
![Image]()
![Image]()
![Image]()
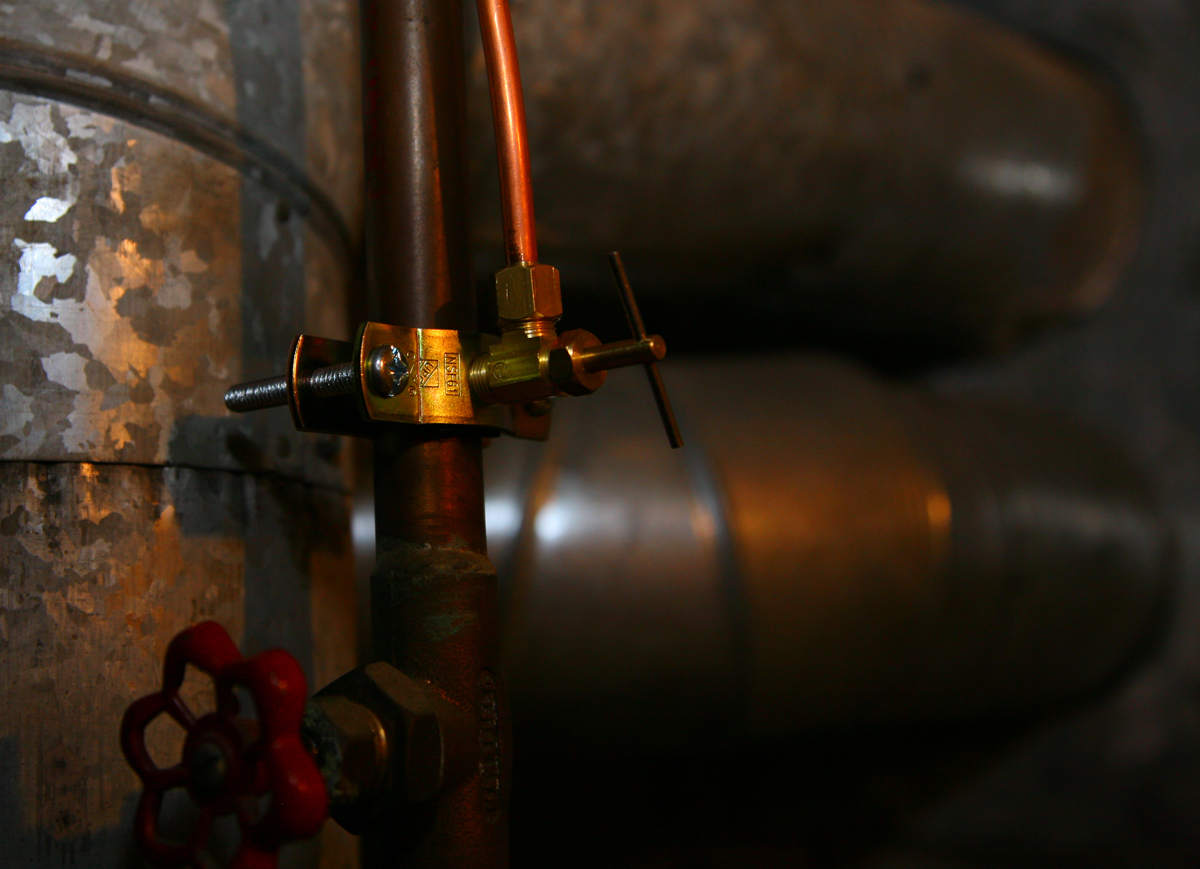
Now that the drainage part is constructed the only other thing to do is tap into your house water main! Now, if you are like me, you will probably be nervously shaking your head right now scrambling to click the back button to get out of here. But! Have no fear! A company called Watts makes an ice-maker installation kit that is designed to clamp onto your main copper water pipe and make a small hole in it, allowing adjustable water flow. All you need to do is buy the kit, screw it onto your a cold water pipe somewhere in the house (this can be a sink, bath, boiler copper water pipe of ~1 inch diameter) and turn the knob for fresh clean water!
This is what my pipe looked like after I screwed it in:
![Image]()
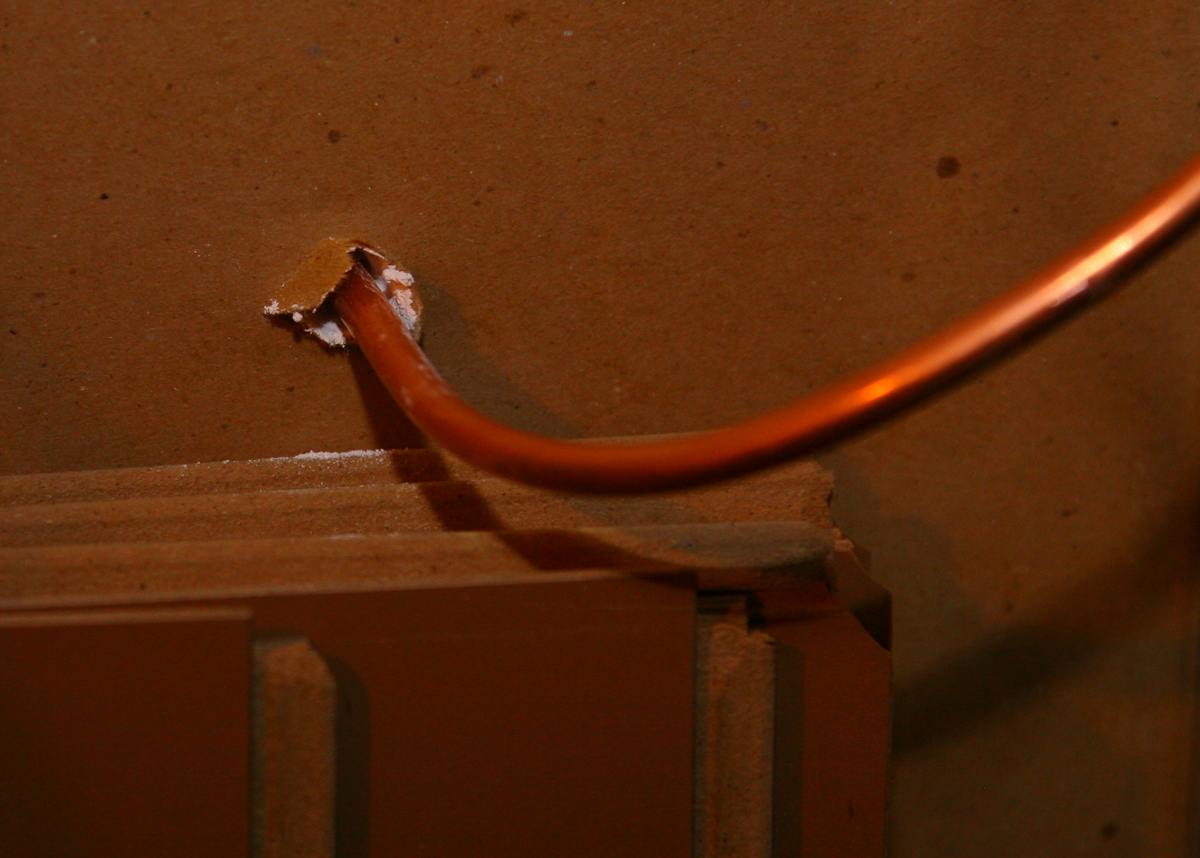
Then I snaked the copper tube through ducts in the basement and made a small hole through the wall right into my fish tank!
![Image]()
This is what the tube looks like coming into the tank from the wall:
![Image]()
I chose to put the the fresh water from the copper tube on one side of my tank and the overflow on the opposite side of the tank. This will ensure that the freshwater you are adding (cold water) will sink to the bottom of your tank and by the time it warms up and rises to the opposite side where the overflow is located (near the top) it will be old water.
Word of caution if you have chlorinated water I would set the flow rate very low, a few drips per second so that the chlorine has a chance to degauss and not kill your fish. If you have chloramine in your water... then I suppose this won't work for you at all. Also, if you have a water softening system on your house that adds salts to the water to make it softer you should add the ice maker tube to the copper pipe before it enters the salt softening machine, this will ensure that only fresh water enters your tank. Well water users will be fine at whatever flow rate they desire since no chemicals are added to their water pipes
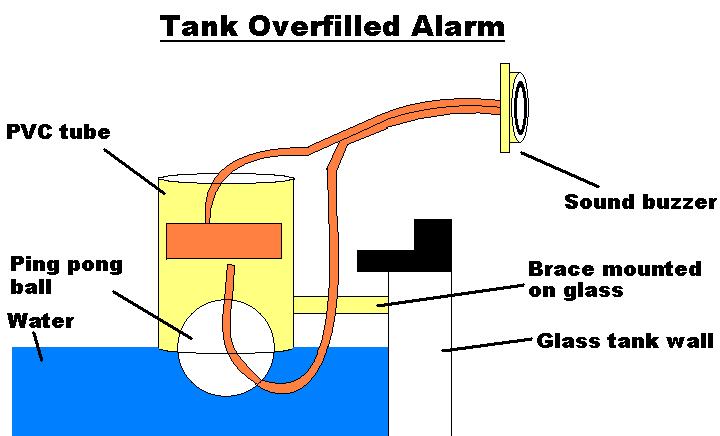
And that is it! All you need to do now is turn the ice maker tube on ad the desired flow rate and fresh clean water will flow into your tank and be constantly drained down the overflow. The large 1.25 inch diameter PVC tubing overflow will not get clogged since it is so wide, and since the water level sits at the lip of the water intake pipe. Fish, and leaves won't have a chance to cover the entire opening. Even if they did, the steady trickle of water coming in (assuming you choose a slow flow rate) won't overflow the tank quickly, so the most you are looking at is a few gallons of mess per day, which really isn't that bad. I plan to design an alarm to notify me if the tank is overfilling, I'll post the designs for that soon. Enjoy!
This is what the final product looks like. I decided to mount it on the wall in a spot that I could access it easily, but it could very easily just be mounted behind the tank so that nothing except the water intake tube sticks over the edge of the tank. You can also make the system in black PVC so that it is less visible.

This is what will be visible inside the tank

I went about making this system using the idea of an overflow. Basically an overflow is a partial siphon that never fully drains out the tube of water. It responds to an increase in pressure (from the water on top of it in the tank) by pushing some water out of the waste water pipe.
Here is a diagram of what I am talking about:
In a nutshell the important concepts of an overflow are:
The water intake pipe needs to be at the same level as the waste water pipe (seen on the right) to work properly. A hole is also needed above the waste water pipe to equalize the pressure otherwise a constant siphon will be formed when water is added to the system and it will drain all the water out of the tube. To make an overflow, water must remain in the tube at all times and any bubbles trapped within the solid blue section must be removed for proper function.
But for those less familiar with the physics involved in why this works:
Looking at the diagram, water needs to be in the solid blue part of the tube, this means that there should be solid water in the tube from the intake (on the left) to the waste water tube (on the right) with no air bubbles. When this situation is achieved what happens is if pressure is applied to the water intake side the water in the tube has no place to be pushed out of the way except through the tube. The compressed water is forced through the tube and out the waste water side on the right. If the object applying pressure is a slightly overfilled tank then the water itself will be sucked through the tube and out into the waste water end.
Very important to all this is the fact that on the waste water side a hole must be cut on the upper part of the tube. This hole allows the air pressure to equalize which lets the water sit in the bent tube shape permanently. If the hole was not there then a siphon would be created and siphons tend to suck all the water out of a tube making it useless for multiple uses!
Here are a few pictures of what I started out with. These are just generic plumbing PVC tubes, bends and parts that you can find at any hardware store for a few measly dollars. I used PVC pipe joiner to glue them together.


Now that the drainage part is constructed the only other thing to do is tap into your house water main! Now, if you are like me, you will probably be nervously shaking your head right now scrambling to click the back button to get out of here. But! Have no fear! A company called Watts makes an ice-maker installation kit that is designed to clamp onto your main copper water pipe and make a small hole in it, allowing adjustable water flow. All you need to do is buy the kit, screw it onto your a cold water pipe somewhere in the house (this can be a sink, bath, boiler copper water pipe of ~1 inch diameter) and turn the knob for fresh clean water!
This is what my pipe looked like after I screwed it in:
Then I snaked the copper tube through ducts in the basement and made a small hole through the wall right into my fish tank!
This is what the tube looks like coming into the tank from the wall:

I chose to put the the fresh water from the copper tube on one side of my tank and the overflow on the opposite side of the tank. This will ensure that the freshwater you are adding (cold water) will sink to the bottom of your tank and by the time it warms up and rises to the opposite side where the overflow is located (near the top) it will be old water.
Word of caution if you have chlorinated water I would set the flow rate very low, a few drips per second so that the chlorine has a chance to degauss and not kill your fish. If you have chloramine in your water... then I suppose this won't work for you at all. Also, if you have a water softening system on your house that adds salts to the water to make it softer you should add the ice maker tube to the copper pipe before it enters the salt softening machine, this will ensure that only fresh water enters your tank. Well water users will be fine at whatever flow rate they desire since no chemicals are added to their water pipes
And that is it! All you need to do now is turn the ice maker tube on ad the desired flow rate and fresh clean water will flow into your tank and be constantly drained down the overflow. The large 1.25 inch diameter PVC tubing overflow will not get clogged since it is so wide, and since the water level sits at the lip of the water intake pipe. Fish, and leaves won't have a chance to cover the entire opening. Even if they did, the steady trickle of water coming in (assuming you choose a slow flow rate) won't overflow the tank quickly, so the most you are looking at is a few gallons of mess per day, which really isn't that bad. I plan to design an alarm to notify me if the tank is overfilling, I'll post the designs for that soon. Enjoy!