Hi all,
I'm new to this hobby again and wanted to start off with something different. I have come across many DIY ADA style stands made from MDF or Plywood or Pine.. but what about mother natures' beautiful exotic woods?.. I live in Australia and we have some beautiful species and this one is my favourite so far:
Blackheart Sassafras Description:
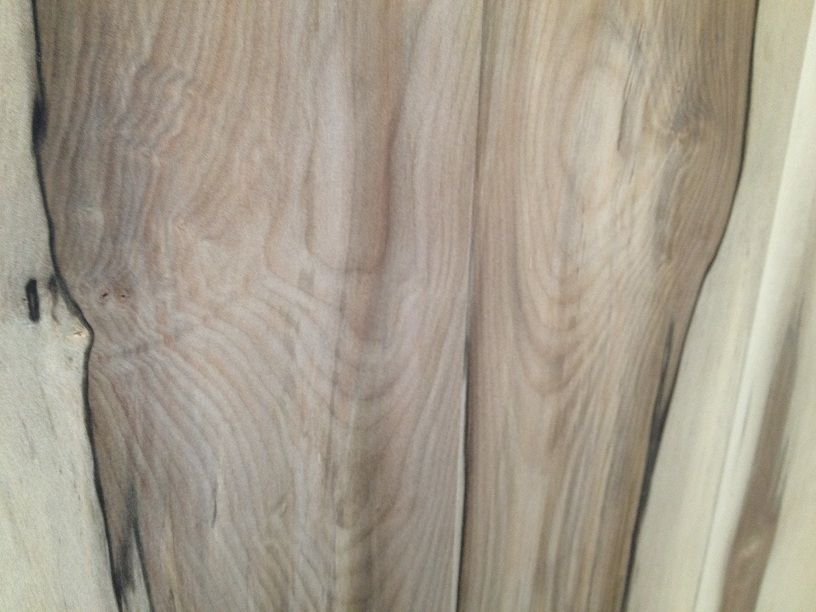
Sassafras grows as an understorey tree in Tasmania's wet mixed forests and rainforests but also grows in Victoria and New South Wales. Timber from the plain sassafras logs was once used for clothes pegs because they do not contain any tannin. Today sassafras is famous for its spectacular black-heart stain caused by naturally occuring wood fungi which produces a range of contrasting brown to black colours in the heartwood.
Black-heart sassafras timber is used in wood turning, furniture, joinery, for veneers and in many souvenir items. Creative veneer lay-ups can produce stunning effects with even slight amounts of heart stain. Spalted sassafras timber, fine dark lines caused by stain fungi in the log after harvesting, is also attractive and popular in craft and furniture items. (Taken from IST Australia)
I have been able to source a small quantity just enough to make this cabinet. Before purchasing any woods to use for furniture, make sure its been kiln dried, seasoned and has a complete flat surface with no warping or cupping in the wood. Otherwise its not usable and cannot be joined properly and you will have a "wonky" cabinet.
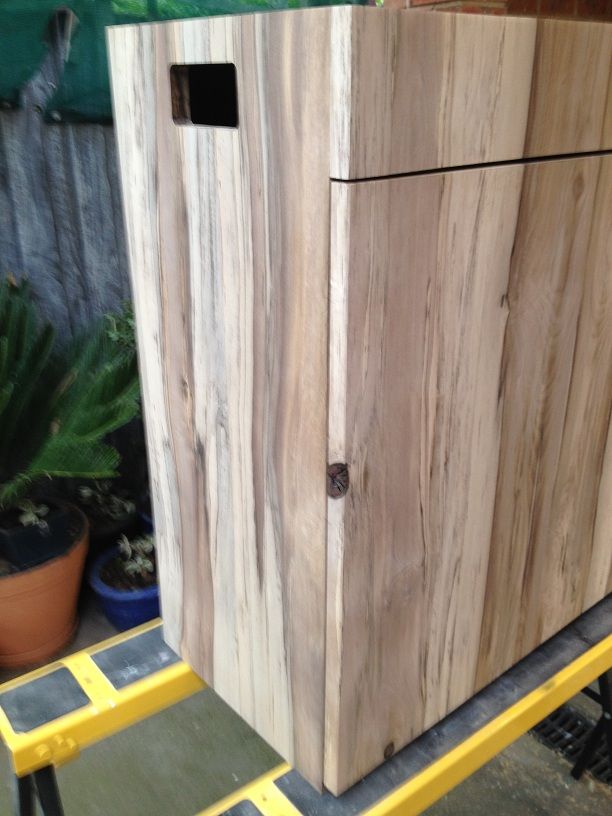
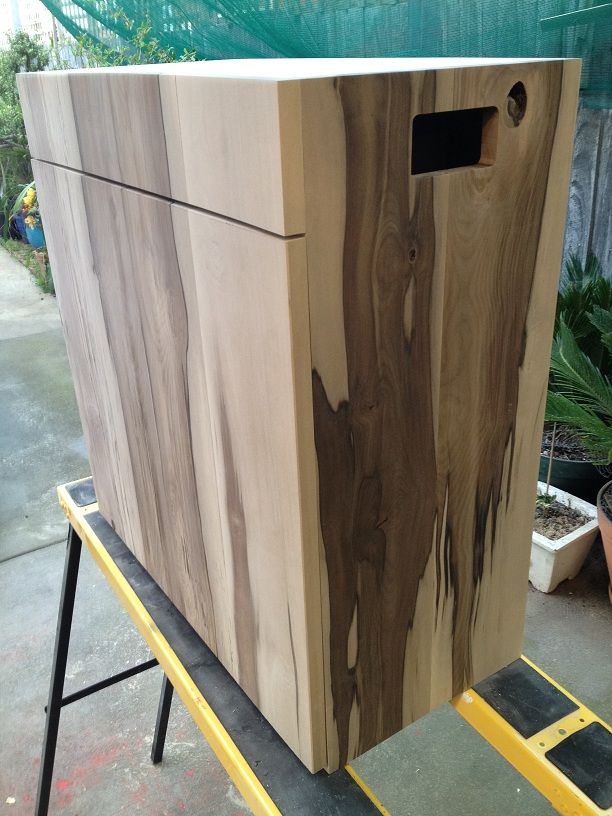
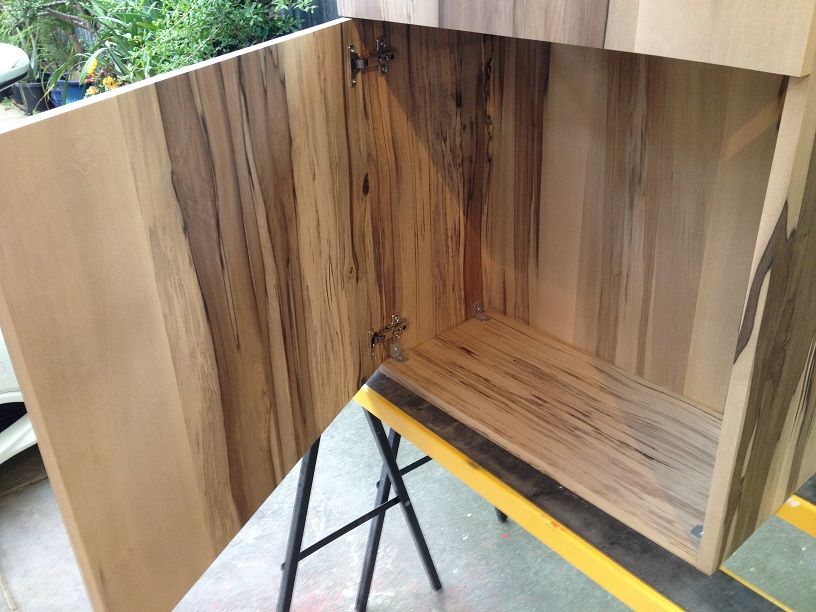
Dimensions are 600mm Length x 300mm Wide x 650mm High x 18mm Thick.
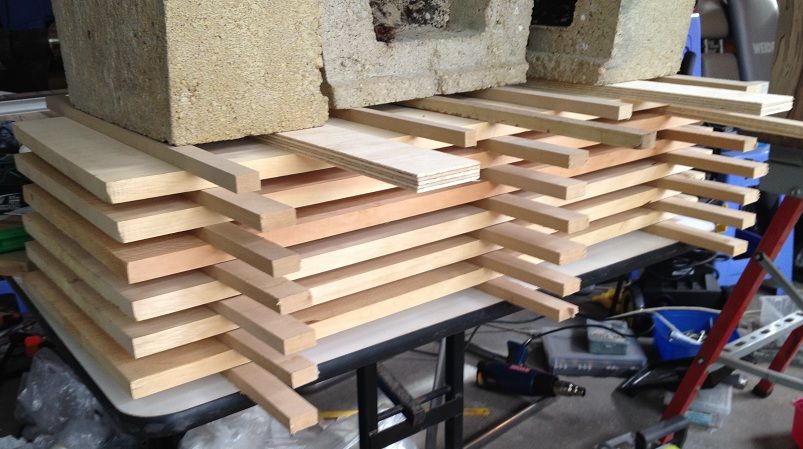
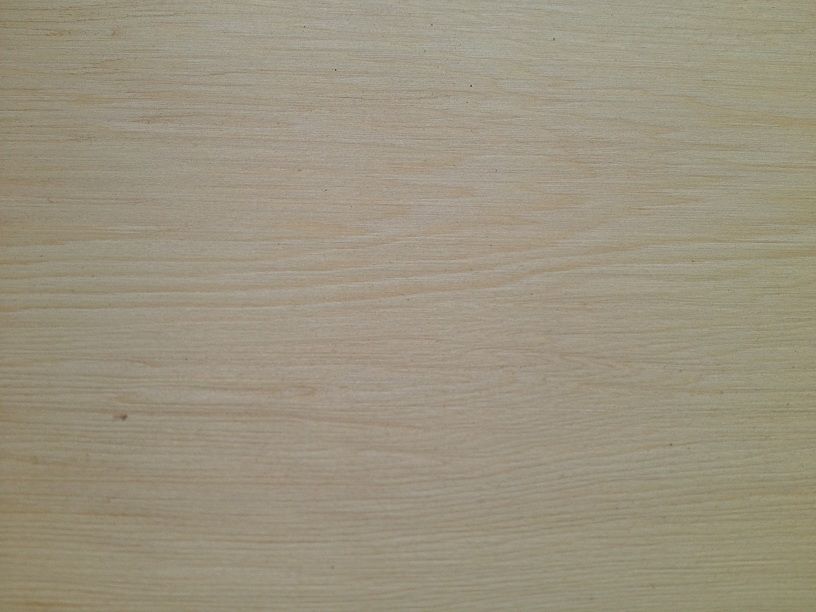
First task was to surface plane all the required pieces, pair them up with familiar patterns on each side and cut the panels to size. Here you can see the beautiful natural tones and colours in this blackheart wood.
![Image]()
Next was to join the wood and give it strength in between the joints so we dont get pieces warping or moving once complete. I chose to make biscuit joints and use size 20 biscuits for this project and titebond III glue.
![Image]()
I used 4 biscuits between each join.
![Image]()
Next clamp all the pieces together to form a tight and straight fit. Leave to dry for 24 hours before sanding
![Image]()
Here's the finished back piece. Will look wonderful once finished using pure danish or tung oil. Note the pairing of wood to make it look more natural and not so out of place.
![Image]()
To be continued..
I'm new to this hobby again and wanted to start off with something different. I have come across many DIY ADA style stands made from MDF or Plywood or Pine.. but what about mother natures' beautiful exotic woods?.. I live in Australia and we have some beautiful species and this one is my favourite so far:
Blackheart Sassafras Description:
Sassafras grows as an understorey tree in Tasmania's wet mixed forests and rainforests but also grows in Victoria and New South Wales. Timber from the plain sassafras logs was once used for clothes pegs because they do not contain any tannin. Today sassafras is famous for its spectacular black-heart stain caused by naturally occuring wood fungi which produces a range of contrasting brown to black colours in the heartwood.
Black-heart sassafras timber is used in wood turning, furniture, joinery, for veneers and in many souvenir items. Creative veneer lay-ups can produce stunning effects with even slight amounts of heart stain. Spalted sassafras timber, fine dark lines caused by stain fungi in the log after harvesting, is also attractive and popular in craft and furniture items. (Taken from IST Australia)
I have been able to source a small quantity just enough to make this cabinet. Before purchasing any woods to use for furniture, make sure its been kiln dried, seasoned and has a complete flat surface with no warping or cupping in the wood. Otherwise its not usable and cannot be joined properly and you will have a "wonky" cabinet.
Dimensions are 600mm Length x 300mm Wide x 650mm High x 18mm Thick.
First task was to surface plane all the required pieces, pair them up with familiar patterns on each side and cut the panels to size. Here you can see the beautiful natural tones and colours in this blackheart wood.

Next was to join the wood and give it strength in between the joints so we dont get pieces warping or moving once complete. I chose to make biscuit joints and use size 20 biscuits for this project and titebond III glue.

I used 4 biscuits between each join.

Next clamp all the pieces together to form a tight and straight fit. Leave to dry for 24 hours before sanding

Here's the finished back piece. Will look wonderful once finished using pure danish or tung oil. Note the pairing of wood to make it look more natural and not so out of place.

To be continued..
")